Everything about NFT storage with a Demo App tutorial
A Free storage for NFTs with marketplace Compatible Metadata creation in just a Click


Do you want to prepare a Compatible metadata according to standards and Upload it IPFS , all in a Single Click ??
Then what are you waiting for, Let's dive into the Blog !!.
In this Blog We will discuss about NFT.storage , an awesome product by Protocol Labs for NFTs . We will also create a Demo Next.js App with NFT storage via JS client. 🚀🚀
What is NFT Storage ?
- NFT.Storage is a storage service that lets you upload off-chain NFT data(like metadata, images, and other assets) for free, with the goal to store all NFT data as a public good .
- The data is stored perpetually in the Filecoin decentralized storage network and made available over IPFS via its unique content ID
- NFT.Storage is especially useful for individual creators who are minting NFTs, or NFT tooling developers
Why NFT Storage ?
- It is super easy to use and integrate in your dApp using the Available APIs , SDKs .
- We get the NFT Compatible Metadata in a single click , eliminating hassle of preparing it .
- Filecoin provides long-term storage for the data ensuring that even if NFT.Storage is attacked or taken down the NFT data persists!
- NFT data stored can be accessed and retrieved from the decentralized IPFS network from any peer that has the content as we get a CID for the Data stored.
How to use NFT Storage ?
There are multiple methods of storing Metadata using NFT.storage , so you can choose according to your purpose and we will go through each one in brief.
Via NFT.storage Website
- Login on NFT.storage
- Go to new-files section
- Select the Already prepared NFT metadata file to upload
With NFTUp
- We will don't go deep into that now, you can Refer this blog for using NFTUp and setup it according to the process.
With JS Client and Node.js
- Get an API token From API Keys after creating an account
- Create a directory to work in
- Create a
package.jsonfile and add this code to the file
{
  "name": "scripts",
  "version": "1.0.0",
  "description": "",
  "main": "index.js",
  "scripts": {
    "test": "echo \"Error: no test specified\" && exit 1"
  },
  "author": "",
  "license": "ISC",
  "dependencies": {
    "mime": "^3.0.0",
    "nft.storage": "^6.4.1"
  }
}
This contain 2 packages namely nft.storage and mime
- Run
npm installin the terminal of same directory - Create a file named
upload.mjsand this code to your file
// Import the NFTStorage class and File constructor from the 'nft.storage' package
import { NFTStorage, File } from "nft.storage";

// The 'mime' npm package helps us set the correct file type on our File objects
import mime from "mime";

// The 'fs' builtin module on Node.js provides access to the file system
import fs from "fs";

// The 'path' module provides helpers for manipulating filesystem paths
import path from "path";

// Paste your NFT.Storage API key into the quotes:
const NFT_STORAGE_KEY = "REPLACE_ME_WITH_YOUR_KEY";

/**
 * Reads an image file from `imagePath` and stores an NFT with the given name and description.
 * @param {string} imagePath the path to an image file
 * @param {string} name a name for the NFT
 * @param {string} description a text description for the NFT
 */
async function storeNFT(imagePath, name, description) {
  // load the file from disk
  const image = await fileFromPath(imagePath);

  // create a new NFTStorage client using our API key
  const nftstorage = new NFTStorage({ token: NFT_STORAGE_KEY });

  // call client.store, passing in the image & metadata
  return nftstorage.store({
    image,
    name,
    description,
  });
}

/**
 * A helper to read a file from a location on disk and return a File object.
 * Note that this reads the entire file into memory and should not be used for
 * very large files.
 * @param {string} filePath the path to a file to store
 * @returns {File} a File object containing the file content
 */
async function fileFromPath(filePath) {
  const content = await fs.promises.readFile(filePath);
  const type = mime.getType(filePath);
  return new File([content], path.basename(filePath), { type });
}

/**
 * The main entry point for the script that checks the command line arguments and
 * calls storeNFT.
 *
 * To simplify the example, we don't do any fancy command line parsing. Just three
 * positional arguments for imagePath, name, and description
 */
async function main() {
  const args = process.argv.slice(2);
  if (args.length !== 3) {
    console.error(
      `usage: ${process.argv[0]} ${process.argv[1]} <image-path> <name> <description>`
    );
    process.exit(1);
  }

  const [imagePath, name, description] = args;
  const result = await storeNFT(imagePath, name, description);
  console.log(result);
}

// Don't forget to actually call the main function!
// We can't `await` things at the top level, so this adds
// a .catch() to grab any errors and print them to the console.
main().catch((err) => {
  console.error(err);
  process.exit(1);
});
This script first take the input of name , description and image from the node terminal which we will provide while running the script and converts that into uploadable version and then Prepares the metadata and upload it to the IPFS
- Create a folder named
files& Store the image file in the folder - Run the script with following command
node upload.mjs files/<Image Name> '<Name>' '<Description>'
CID and token URI get's logged in the console which can be stored for creating NFTs , provide the url part for the metadata while setting the URI for the NFT.
Voila ! 🎊🥳 You have Successfully Created NFT Metadata using Script , run JS script any time you want to create metadata .
Next.js App with NFT.storage SDK Package
I have already prepared a Dapp for you all to try it out , so go ahead with live link and try .
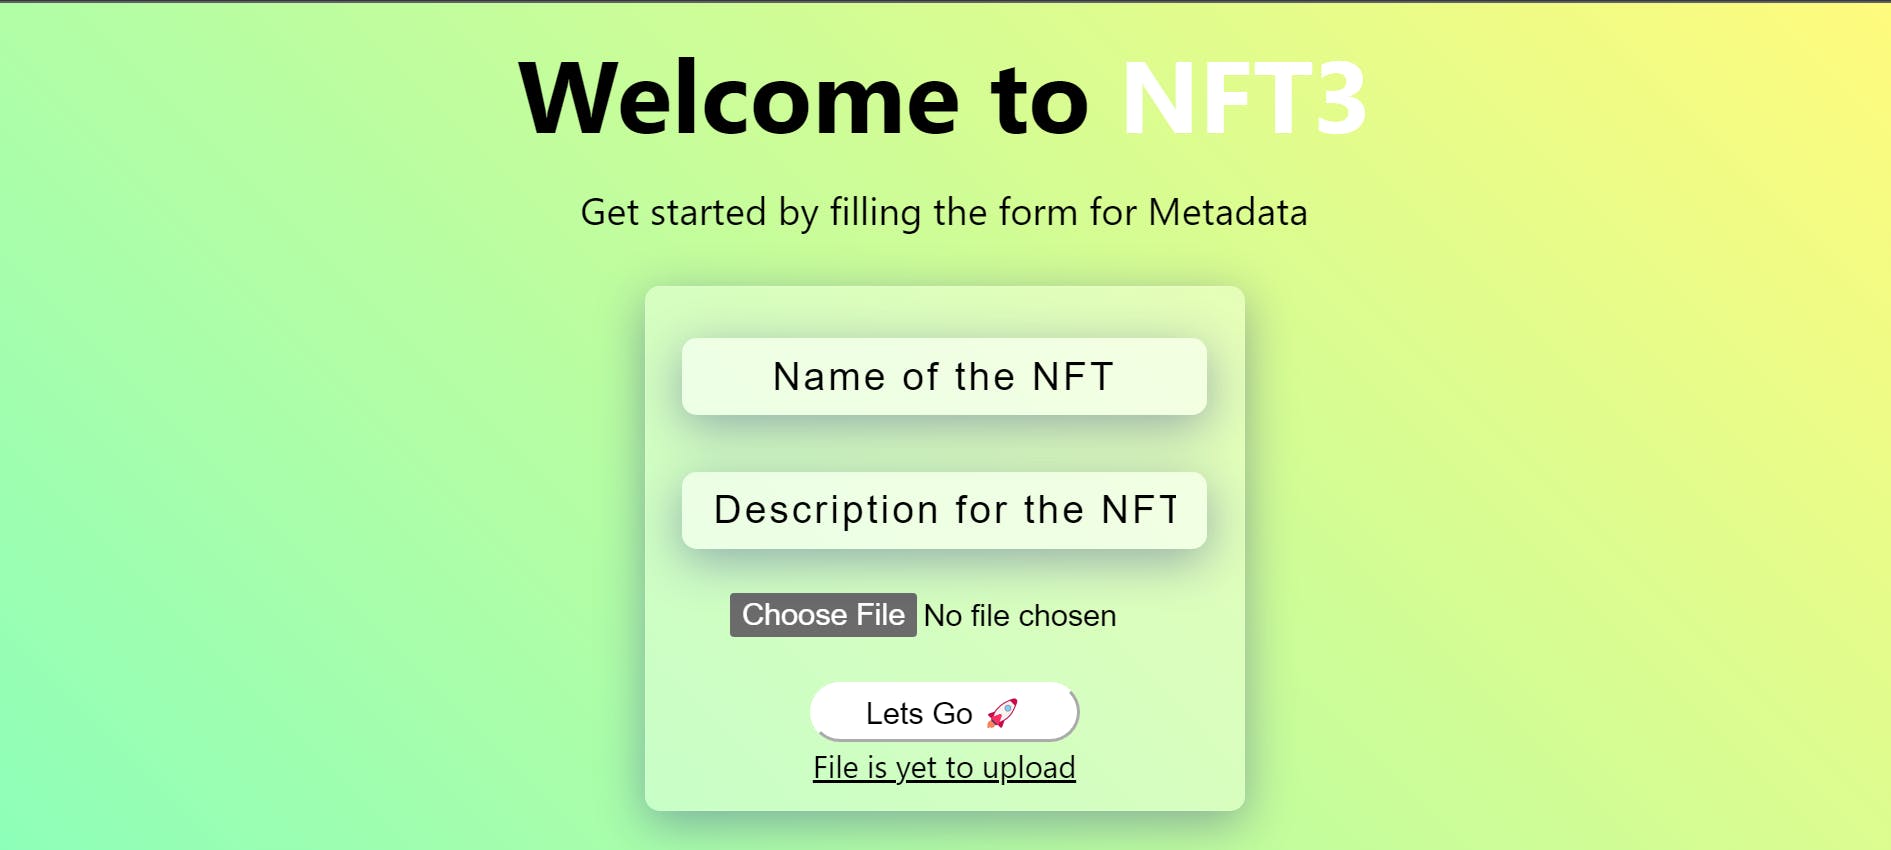
We are going to create a Demo app for creating metadata in the App with just a Click and you can integrate the same in your app , so Let's Go
- Get an API token From API Keys after creating an account
- Create a Next / React App according to your preference
- Install package with
npm install nft.storage - Create a Component
StoreMetadata.jsxand add this code to the file
import { NFTStorage } from "nft.storage";
import { NFT_STORAGE_API_KEY } from "../constants";

/// used NFT.storage to prepare the metadata for the NFT
export const StoreMetadata = async (image, Name, Description) => {
  // In case you are using env then uncomment this
  //const NFT_STORAGE_API_KEY = process.env.NFT_STORAGE_API_KEY;

  console.log("Preparing Metadata ....");
  const nft = {
    image: image,
    name: Name,
    description: Description,
  };
  console.log("Uploading Metadata to IPFS ....");
  const client = new NFTStorage({ token: NFT_STORAGE_API_KEY });
  const metadata = await client.store(nft);
  console.log(metadata);
  console.log("NFT data stored successfully 🚀🚀");
  console.log("Metadata URI: ", metadata.url);

  return metadata;
};
This is the main component that prepares the metadata from the inputs we give and then uploads it to IPFS via JS client created.
You can customize the metadata according to the standards for the Token type Example Metadata file which you can edit which data you want to add or select.
{
  "name": "Storing the World's Most Valuable Virtual Assets with NFT.Storage",
  "description": "The metaverse is here. Where is it all being stored?",
  "image": null,
  "properties": {
    "type": "blog-post",
    "origins": {
      "http": "https://nft.storage/blog/post/2021-11-30-hello-world-nft-storage/",
      "ipfs": "ipfs://bafybeieh4gpvatp32iqaacs6xqxqitla4drrkyyzq6dshqqsilkk3fqmti/blog/post/2021-11-30-hello-world-nft-storage/"
    },
    "authors": [
      {
        "name": "David Choi"
      }
    ],
    "content": {
      "text/markdown": "The last year has witnessed the explosion of NFTs onto the world’s mainstage. From fine art to collectibles to music and media, NFTs are quickly demonstrating just how quickly grassroots Web3 communities can grow, and perhaps how much closer we are to mass adoption than we may have previously thought. <... remaining content omitted ...>"
    }
  }
}
- In the main
index.jsfile Set states for the inputs(in our case name , description and Image file)const [name, setName] = useState(""); const [description, setDescription] = useState(""); const [img, setImg] = useState([]); - Then input can be taken in this way , from this Html code
<div> <div> <input className={styles.input} type="text" value={name} placeholder="Name of the NFT" onChange={(e) => setName(e.target.value)} ></input> </div> <div > <input className={styles.input} type="text" value={description} placeholder="Description for the NFT" onChange={(e) => setDescription(e.target.value)} ></input> </div> <div> <label className={styles.inputLabel}> <input className={styles.inputBox} type="file" onChange={(e) => setImg(e.target.files[0])} ></input> </label> </div> </div> - Create a function that calls Store metadata from the component we created(Be sure to import it first)
const upload = async () => { try { const metadata = await StoreMetadata(img, name, description); const uri = metadata.url; console.log(metadata); const url = `https://ipfs.io/ipfs/${metadata.ipnft}`; console.log("NFT metadata uploaded to IPFS"); } catch (err) { console.log(err); } }; - This function can be called with a button , when the inputs have already been set.
- Metadata return object is of format
Token { ipnft: 'bafyreifrkkhbwkf3fibwhbzcmpqnmh3b4t5t4ig7qdtymkdoatcycwe6n4', url: 'ipfs://bafyreifrkkhbwkf3fibwhbzcmpqnmh3b4t5t4ig7qdtymkdoatcycwe6n4/metadata.json' } - CID will be logged along with the url to Checkout the uploaded data . You can use the required data accordingly to mint NFT ,etc.
Congratulations 🥳🥳 , you have created a dApp that creates & uploads metadata to IPFS via NFT.storage.
All the reference are from NFT.storage 📃 docs and my own Research. For any other reference Visit: https://nft.storage/docs
Thank you for reading the Blog , I hope you were able to learn more about from a Dev point of view. If you really liked the content , do Share it with your friends and drop a comment in case you need any help 👍
Follow me on Twitter @0xdhruva for more .
Meet you Next time soon with a New blog , Stay tuned !! 👋👋